

Table of Contents
Introduction
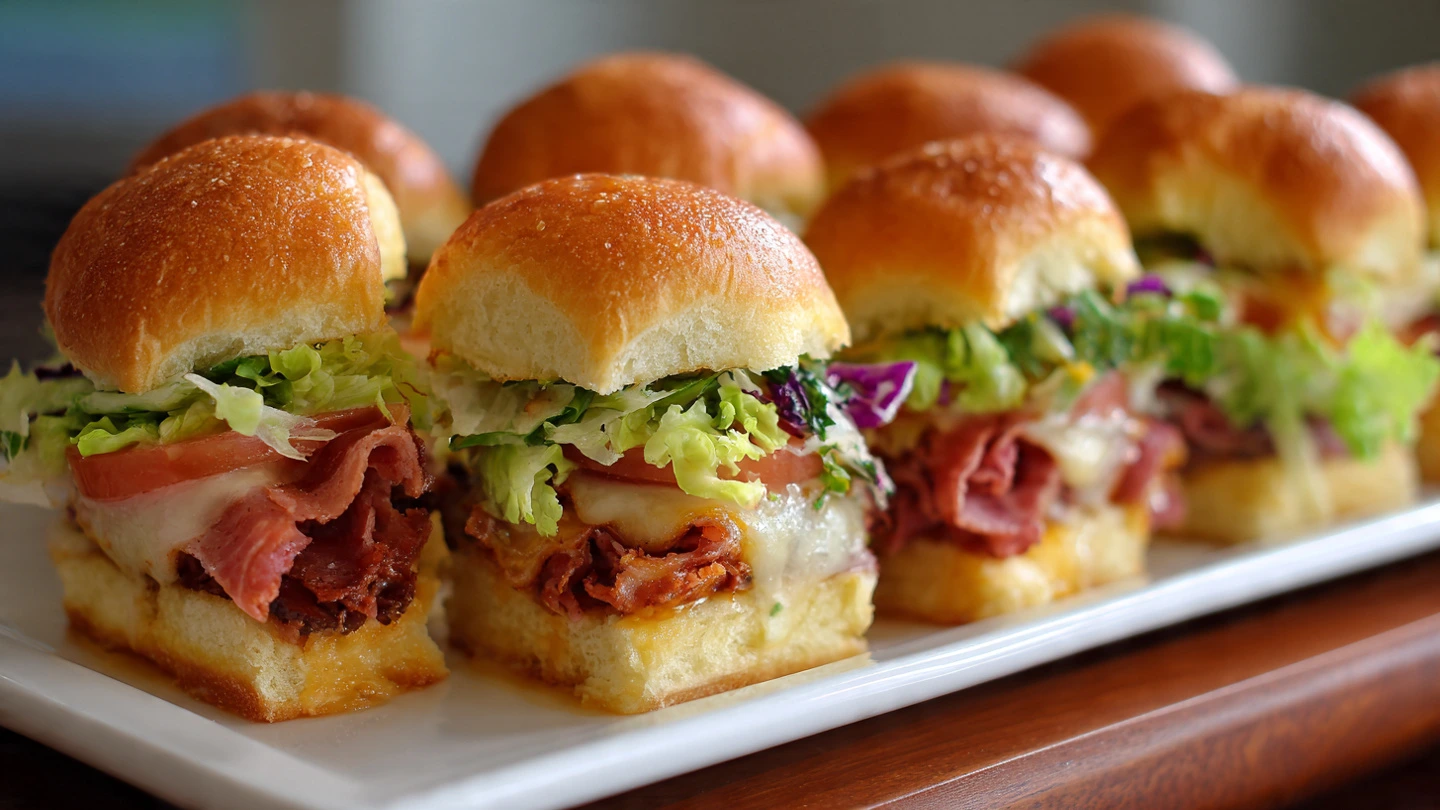
In the world of party foods and easy weeknight dinners, few dishes have achieved the rock-star status of Hawaiian Roll Sliders
. These small, warm sandwiches pack an incredible punch of flavor, combining sweet, savory, and cheesy elements into a single, irresistible bite
. They are the undisputed champion of potlucks, game day spreads, and family gatherings, beloved for their simplicity, versatility, and crowd-pleasing nature
. This comprehensive guide will walk you through everything you need to know to master this iconic dish, from its dual history to inventive variations, perfect pairings, and expert troubleshooting.
A Tale of Two Histories: The Roll and the Recipe
The magic of the modern Hawaiian roll slider is the result of two distinct culinary traditions merging: the creation of the iconic sweet roll and the evolution of a comforting Southern sandwich.
The Star of the Show: A Brief History of King’s Hawaiian Rolls
Before we can talk about the sliders, we must pay homage to their foundation: the iconic King’s Hawaiian sweet roll
. The story begins in the 1950s in Hilo, Hawaii, where Robert R. Taira, the Hawaiian-born son of Japanese immigrants, opened his first bakeshop after graduating at the top of his baking class
. Initially called Robert’s Bakery, it was here that the first soft, round loaves of what would become a culinary legend were created
. The recipe was inspired by Portuguese sweet bread, a local favorite in Hawaii, which often incorporates milk, sugar, and sometimes pineapple juice for its signature sweetness
The bread’s popularity grew, and in 1963, the bakery moved to King Street in Honolulu and was renamed King’s Bakery . It became a local institution, with customers lining up for the irresistible bread served with the “Aloha Spirit”
. The fame of these sweet, fluffy rolls spread to the mainland as tourists and locals began shipping them as gifts
. Recognizing the demand, Taira made a pivotal decision, opening a bakery in Torrance, California, in 1977, officially named King’s Hawaiian Bakery
. This move introduced the mainland U.S. to the unique product
. The introduction of the 12-pack of Original Hawaiian Sweet Dinner Rolls in the 1980s cemented their place in American kitchens, becoming a category-defining product perfect for everything from dinner rolls to the base of the perfect slider
The Southern Roots of a Comforting Classic: “Funeral Sandwiches”
The recipe itself has a history deeply rooted in Southern hospitality, where the sliders are often known as “funeral sandwiches”
. The name reflects their frequent appearance at after-funeral receptions, a part of a broader Southern custom where community members provide food to grieving families, a tradition dating back to at least the late 18th century
. Alongside dishes like fried chicken and potato salad, these warm, simple sandwiches offered comfort and sustenance that was easy to prepare for a large crowd and could be eaten without much fuss
The signature ‘pull-apart’ style, where the rolls are baked together in a sheet and then separated, is a key part of their appeal and likely evolved for easy, communal serving
. This modern association with King’s Hawaiian rolls is a perfect marriage of convenience and flavor
. The rolls come in a connected sheet, making them easy to slice and assemble en masse, while their subtle sweetness provides a perfect contrast to savory fillings
The Quintessential Recipe: Classic Ham and Swiss Sliders
This is the recipe that started it all—a delectable combination of savory ham, melted Swiss cheese, and a rich, buttery glaze poured over sweet Hawaiian rolls
. It’s a nearly foolproof recipe that is ready in under an hour and guaranteed to disappear fast
Ingredients
- For the Sliders:
- 1 package (12-count) KING’S HAWAIIAN Original Hawaiian Sweet Dinner Rolls
- ¾ pound thinly sliced deli ham (Black Forest, honey ham, or classic smoked ham work well)
- ¾ pound thinly sliced Swiss cheese (Provolone or cheddar are also great options)
- ¼ to ⅓ cup mayonnaise (optional, but adds moisture and richness)
- For the Savory Butter Topping:
Step-by-Step Instructions
- Preheat and Prepare the Pan: Preheat your oven to 350°F (175°C) . Lightly grease a 9×13 inch baking dish with non-stick cooking spray or butter .
- Prepare the Rolls: The key to perfect sliders is to keep the rolls connected . Place the entire slab of 12 rolls on a cutting board and use a large serrated bread knife to carefully slice them in half horizontally, creating a single top and bottom “slab” . Do not pull the individual rolls apart . Place the bottom slab of rolls into your prepared baking dish .
- Assemble the Layers: If using, spread a thin, even layer of mayonnaise on the cut side of the bottom slab of rolls . Next, layer the ingredients evenly, ensuring coverage to the edges . A common method is to layer half of the ham, followed by all of the Swiss cheese, and then the remaining half of the ham . This double ham layer ensures a hearty slider . Finally, place the top slab of rolls back on top .
- Mix the Butter Topping: In a small bowl, whisk together the melted butter, Dijon mustard, poppy seeds, dried onion, and Worcestershire sauce until well combined . This glaze is what transforms a simple sandwich into an indulgent treat, with the Worcestershire adding umami depth and the mustard providing a tangy counterpoint .
- Glaze the Sliders: Slowly and evenly pour the butter mixture over the tops of the assembled sliders . Use a pastry brush to ensure the entire surface is coated, including the sides and crevices between the rolls .
- Let Them Rest (Optional but Recommended): Cover the baking dish with aluminum foil and let the sliders sit at room temperature for about 10 minutes . This step allows the rolls to absorb some of the delicious butter sauce, infusing them with flavor .
- Bake to Perfection: Bake the foil-covered sliders for 15-20 minutes, or until the cheese is completely melted and the sliders are heated through . Then, remove the foil and bake for an additional 2-5 minutes . This final, uncovered baking step is crucial for creating a slightly crispy, golden-brown top .
- Serve and Enjoy: Remove the sliders from the oven and let them rest for a few minutes . This allows the cheese to set slightly, which helps hold the sliders together . You can either slice them into individual portions directly in the pan or transfer the entire slab to a cutting board for easier cutting . Serve immediately while they are warm and the cheese is gooey .


Beyond the Classic: Delicious Slider Variations
One of the best things about Hawaiian roll sliders is their incredible versatility
. The classic ham and cheese is just the beginning. Here are some popular and creative variations to try.
Roast Beef & Provolone Sliders with Horseradish Butter
These savory sliders feature tender roast beef and melted provolone, complemented by a zesty horseradish cream and a rich butter topping with everything bagel seasoning
- Yields: 12 sliders
- Prep time: 15 minutes
- Cook time: 20-25 minutes
Ingredients
- For the Sliders:
- For the Horseradish Cream Spread:
- For the Savory Butter Topping:
Instructions
- Preheat and Prepare: Preheat your oven to 350°F (175°C) . Line a 9×13-inch baking dish with parchment paper or greased foil .
- Make the Horseradish Cream: In a small bowl, whisk together the mayonnaise, prepared horseradish, and Dijon mustard .
- Assemble: Slice the slab of rolls in half horizontally and place the bottom half in the dish . Spread the horseradish cream on the bottom buns . Layer with half the provolone, all the roast beef, the caramelized onions (if using), and the remaining provolone . Place the top slab of rolls on top .
- Add the Topping: Whisk together the melted butter, Worcestershire sauce, everything bagel seasoning, garlic powder, and onion powder . Brush this mixture evenly over the tops of the rolls .
- Bake: Cover with foil and bake for 15-22 minutes, until the cheese is melted . Remove the foil and bake for another 3-10 minutes, until the tops are golden brown .
- Serve: Let rest for a few minutes before cutting into individual sliders . For an extra touch, serve with a side of au jus for dipping .
Buffalo Chicken Sliders
These sliders pack the spicy, tangy flavor of Buffalo wings into a convenient, cheesy bite
. Using a rotisserie chicken makes this recipe exceptionally quick
- Yields: 12 sliders
- Prep time: 10 minutes
- Cook time: 20-25 minutes
Ingredients
- 1 (12-count) package of Hawaiian rolls
- 2 cups shredded rotisserie chicken
- ½ cup Buffalo hot sauce (e.g., Frank’s Red Hot)
- ½ cup ranch dressing
- 1 cup shredded Provolone or Mozzarella cheese
- 4 tbsp melted butter
- 1 tsp Italian seasoning or garlic salt
Instructions
- Preheat and Prepare: Preheat your oven to 350°F (175°C) . Grease a 9×13-inch baking dish.
- Mix the Filling: In a medium bowl, combine the shredded chicken, Buffalo sauce, and ranch dressing. Stir until the chicken is evenly coated .
- Assemble: Slice the slab of rolls in half horizontally and place the bottom half in the baking dish . Spread the Buffalo chicken mixture evenly over the bottom rolls, then sprinkle the shredded cheese over the chicken . Place the top slab of rolls over the cheese.
- Add the Topping: In a small bowl, whisk together the melted butter and Italian seasoning or garlic salt. Brush this mixture evenly over the tops of the rolls .
- Bake: Cover the dish with foil and bake for 15-20 minutes, until the cheese is melted and the sliders are heated through . Remove the foil and bake for another 2-5 minutes to get the tops golden brown .
- Serve: Let cool for a few minutes before cutting and serving warm .
Cheeseburger Sliders: The Ultimate Crowd-Pleaser
Capturing the classic taste of a cheeseburger in a convenient, shareable format, these savory and cheesy sliders are a guaranteed hit for any party or game day
- Yields: 12 sliders
- Prep time: 15 minutes
- Cook time: 20-25 minutes
Ingredients
- For the Beef Mixture:
- For Assembly:
- For the Savory Butter Topping:
Instructions
- Cook the Ground Beef: Preheat your oven to 350°F (177°C) . In a large skillet, sauté the diced onion until softened . Add the ground beef, breaking it apart, and cook until browned . Season with salt, pepper, and garlic powder .
- Drain and Mix: Carefully drain off any excess grease to prevent soggy sliders . Stir in the ketchup, Dijon mustard, Worcestershire sauce, and mayonnaise until combined . Using a ground beef with a higher fat content (like 80/20) and incorporating mayonnaise can help keep the filling moist .
- Assemble the Sliders: Slice the slab of rolls in half horizontally and place the bottom half in a greased 9×13-inch baking dish . To create a barrier against sogginess, layer half of the cheese slices over the bottom buns . Evenly spread the beef mixture over the cheese, then top with the remaining cheese slices . Place the top half of the rolls on top .
- Add the Topping and Bake: Whisk together the melted butter and Worcestershire sauce . Brush this mixture over the tops of the rolls and sprinkle with sesame seeds . Cover with foil and bake for 15 minutes, then remove the foil and bake for another 5-10 minutes until golden brown .
- Serve: Let the sliders rest for a few minutes before cutting and serving warm .
Vegetarian Mushroom & Lentil Sliders
These hearty vegetarian sliders are packed with a rich, umami-filled mushroom and lentil mixture, offering a deeply savory and satisfying meat-free option
- Yields: 12 sliders
- Prep time: 25 minutes
- Cook time: 25-30 minutes
Ingredients
- For the Mushroom and Lentil Filling:
- 1 tbsp olive oil
- 1 medium onion or 1 large shallot, finely chopped
- 2 cloves garlic, minced
- 1 lb mixed mushrooms (cremini, shiitake, portobello), finely chopped
- 1 ½ cups cooked brown or green lentils
- ¼ cup balsamic vinegar
- 1 tbsp soy sauce or tamari
- 1 tsp dried thyme
- 2 tbsp chickpea flour or all-purpose flour (to bind)
- Salt and freshly ground black pepper to taste
- For Assembly:
- For the Vegetarian Butter Topping:
Cheese Recommendations
For a perfect melt, use freshly shredded cheese, as it melts more evenly than pre-shredded varieties
. A combination of a great melting cheese and a sharper cheese provides a balance of texture and flavor
- Excellent Melters: Provolone, Fontina, Havarti, Muenster, or White American .
- Flavorful Choices: Gruyère, sharp cheddar, or aged Gouda .
Instructions
- Preheat and Prepare: Preheat your oven to 350°F (175°C) . Grease a 9×13-inch baking dish.
- Cook the Filling: In a large skillet over medium heat, heat the olive oil. Sauté the onion and garlic until softened . Add the chopped mushrooms and cook until they release their moisture and begin to brown, about 5-8 minutes .
- Develop Flavor: Stir in the balsamic vinegar and soy sauce, cooking until the liquid has mostly evaporated . Add the cooked lentils and dried thyme, stirring to combine . Sprinkle the chickpea flour over the mixture to act as a binder and stir well . Season with salt and pepper .
- Assemble: Slice the slab of rolls in half horizontally and place the bottom half in the baking dish . For extra protection against sogginess, you can toast the bottom buns for 3-5 minutes before assembling .
- Layer the Sliders: Layer half of the cheese over the bottom buns to create a moisture barrier . Spoon the mushroom-lentil filling evenly over the cheese, then top with the remaining cheese . Place the top slab of rolls on top .
- Add the Topping: In a small bowl, whisk together all ingredients for the butter topping . Brush the mixture evenly over the tops of the rolls .
- Bake: Cover with foil and bake for 15-20 minutes, until the cheese is melted and bubbly . Remove the foil and bake for another 2-5 minutes until the tops are golden brown .
- Serve: Let the sliders rest for a few minutes before cutting into individual portions to help them hold together .
No-Bake Italian Grinder Sliders
Inspired by the viral grinder sandwich, this fresh, creamy, no-bake version comes together in minutes and is perfect for a quick lunch or party appetizer .
- Yields: 12 sliders
- Prep time: 15 minutes
- Cook time: 0 minutes
Ingredients
- For the Sliders:
- For the Creamy Italian Grinder Salad:
Instructions
- Prepare the Grinder Salad: In a medium bowl, whisk together the mayonnaise, red vinegar, pepperoncini brine, oregano, garlic powder, Parmesan cheese, salt, and pepper until the dressing is smooth . Add the shredded lettuce and chopped pepperoncinis and toss to combine. For best results, dress the salad just before assembling to prevent it from becoming soggy .
- Assemble the Sliders: Slice the slab of rolls in half horizontally . Layer the bottom half with sliced turkey and provolone cheese . Top the cheese with sliced tomato and red onion.
- Finish and Serve: Spoon a generous amount of the creamy grinder salad over the vegetables . Place the top halves of the rolls on the sliders, slice into individual portions, and serve immediately .
Troubleshooting: Common Mistakes & Expert Solutions
Avoid common pitfalls with these expert tips to ensure your baked sliders are flawless every time.
- Mistake: Soggy Bottom Buns
- The Problem: Steam and juices from the filling can make the bottom of the rolls wet and mushy .
- The Solution: Create a moisture barrier. You can do this by lightly toasting the bottom slab of rolls for 3-5 minutes before assembling . Alternatively, spread a thin layer of mayonnaise on the buns or place a layer of cheese directly on the bottom buns before adding the filling .
- Mistake: Burnt or Greasy Topping
- The Problem: The butter topping can burn before the filling is hot, or if too much is used, it can make the sliders greasy .
- The Solution: Use aluminum foil. Bake the sliders covered with foil for the first 15-20 minutes to trap steam and heat the filling evenly without burning the tops . Remove the foil for the last few minutes of baking to get a golden, crisp finish . Also, be mindful not to completely oversaturate the rolls with butter .
- Mistake: Unevenly Melted Cheese
- The Problem: The cheese on the sliders in the center of the pan may not melt as quickly as the cheese on the outer edges .
- The Solution: Use freshly shredded cheese, which melts more evenly than pre-shredded varieties that contain anti-caking agents . Covering the pan with foil during the initial bake also traps heat and promotes even melting . Layering cheese both below and above the filling helps ensure everything is gooey and well-distributed .
- Mistake: Dry Fillings
- The Problem: Meat or vegetarian fillings can become dry during the baking process .
- The Solution: Ensure your filling has enough moisture without being watery . For meat fillings, use ground beef with a higher fat content (like 80/20) or incorporate moist ingredients like mayonnaise or Worcestershire sauce . For vegetarian fillings, using ingredients like sautéed mushrooms or a bit of sauce (like the balsamic and soy reduction) helps maintain a juicy texture .
- Mistake: Sliders That Fall Apart
- The Problem: Overstuffed sliders or unstable fillings can cause the final product to be messy and fall apart .
- The Solution: Don’t overstuff the sliders and let them rest after baking . Keep the slab of rolls intact during assembly . After baking, let the sliders rest for a few minutes before cutting; this allows the cheese to set slightly and act as a glue . Use a spatula to gently separate the individual sliders for cleaner serving .
Make-Ahead and Freezing Instructions
- Refrigerating (Up to 24 Hours): Assemble the sliders (for baked versions) with meat, cheese, and other fillings, but do not add the butter topping . Place them in the baking dish, cover tightly, and refrigerate . Store the butter topping separately. When ready to bake, pour the topping over the chilled sliders and bake as directed, adding 5-10 minutes to the initial covered baking time .
- Freezing (Up to 3 Months): Assemble the sliders completely, including the butter topping . Wrap the entire pan tightly with plastic wrap, followed by a layer of aluminum foil to prevent freezer burn . Freeze for up to 3 months . To reheat, thaw the sliders completely in the refrigerator overnight . Bake from thawed at 350°F, covered with foil, for 20-30 minutes until heated through, removing the foil for the last few minutes to brown the tops .
Complete the Meal: Detailed Side Dish Recipes
While sliders can be a meal on their own, serving them with a few well-chosen side dishes can elevate them into a full, satisfying spread
Creamy Baked Macaroni and Cheese
A rich and decadent mac and cheese that’s the perfect comfort food pairing
- Yields: 8 servings
- Prep time: 15 minutes
- Cook time: 30-35 minutes
Ingredients
- 1 lb elbow macaroni
- ½ cup (1 stick) unsalted butter
- ½ cup all-purpose flour
- 3 cups whole milk, warmed
- 1 cup heavy cream, warmed
- 4 cups sharp cheddar cheese, shredded and divided
- 2 cups Gruyère cheese, shredded
- 1 tsp kosher salt
- ½ tsp dry mustard
- ¼ tsp black pepper
- Optional Topping: 1 ½ cups panko breadcrumbs tossed with 4 tbsp melted butter
Instructions
- Preheat oven to 375°F (190°C). Cook macaroni one minute less than package directions for al dente . Drain.
- In a large pot, melt butter over medium heat. Whisk in the flour and cook for one minute to form a roux .
- Gradually whisk in the warm milk and cream until the sauce is smooth and thickened, about 5-7 minutes .
- Remove from heat. Stir in 3 cups of the cheddar and all the Gruyère until melted . Season with salt, dry mustard, and pepper .
- Add the cooked macaroni to the cheese sauce and stir to combine .
- Pour into a greased 9×13-inch baking dish . Top with the remaining 1 cup of cheddar and the optional panko topping .
- Bake uncovered for 25-30 minutes, until bubbly and golden brown .
Tangy Coleslaw with Vinegar-Based Dressing
A crisp, no-mayo coleslaw that provides a refreshing, acidic contrast to the rich sliders
- Yields: 6-8 servings
- Prep time: 10 minutes
Ingredients
- 1 (16-oz) bag shredded cabbage and carrot mix
- 1 cup thinly sliced red onion or ¼ cup sliced green onions
- For the Dressing:
Instructions
- In a large bowl, combine the cabbage mix and onions .
- In a small bowl, whisk together all dressing ingredients until the sugar is dissolved .
- Pour the dressing over the cabbage mixture and toss well . For best results, cover and refrigerate for at least one hour to allow the flavors to meld .
Crispy Baked Sweet Potato Fries
A healthier, yet equally delicious, alternative to traditional fries
- Yields: 4 servings
- Prep time: 15 minutes (+30 min soak time)
- Cook time: 30-35 minutes
Ingredients
- 2 large sweet potatoes, peeled and cut into ¼-inch thick fries
- 2 tbsp avocado or olive oil
- 1 tbsp cornstarch
- 1 tsp sea salt
- 1 tsp garlic powder
- ½ tsp paprika
- For the Dipping Sauce:
- ½ cup mayonnaise
- 2 tbsp ketchup
- ½ tsp smoked paprika
Instructions
- Preheat oven to 425°F (220°C). Line a baking sheet with parchment paper .
- For crispier fries, soak the cut sweet potatoes in cold water for at least 30 minutes to remove excess starch. Drain and dry them thoroughly .
- In a large bowl, toss the dry fries with oil. In a small bowl, whisk together cornstarch and spices, then sprinkle over the fries and toss to coat evenly .
- Arrange fries in a single layer on the baking sheet, ensuring they don’t touch .
- Bake for 15-20 minutes, flip, and bake for another 10-15 minutes until crispy .
- While fries bake, whisk together all dipping sauce ingredients . Serve hot.
Cheesy Hash Brown Casserole
A crowd-pleasing, hearty casserole that’s pure comfort in a dish
- Yields: 8-10 servings
- Prep time: 10 minutes
- Cook time: 50-55 minutes
Ingredients
- 1 (32-oz) bag frozen shredded hash browns, thawed
- 1 (10.5-oz) can cream of mushroom soup (for vegetarian) or cream of chicken
- 1-2 cups sour cream
- 2 cups shredded cheddar cheese, divided
- ¼ cup melted butter
- 1 small onion, finely chopped
- 1 tsp salt
- ¼ tsp black pepper
Instructions
- Preheat oven to 350°F (175°C). Grease a 9×13-inch baking dish .
- In a large bowl, combine the thawed hash browns, soup, sour cream, 1 ½ cups of the cheese, melted butter, onion, salt, and pepper .
- Spread the mixture evenly into the prepared dish .
- Bake uncovered for 45 minutes . Sprinkle the remaining ½ cup of cheese over the top and bake for another 5-10 minutes, until bubbly and melted