

Table of Contents
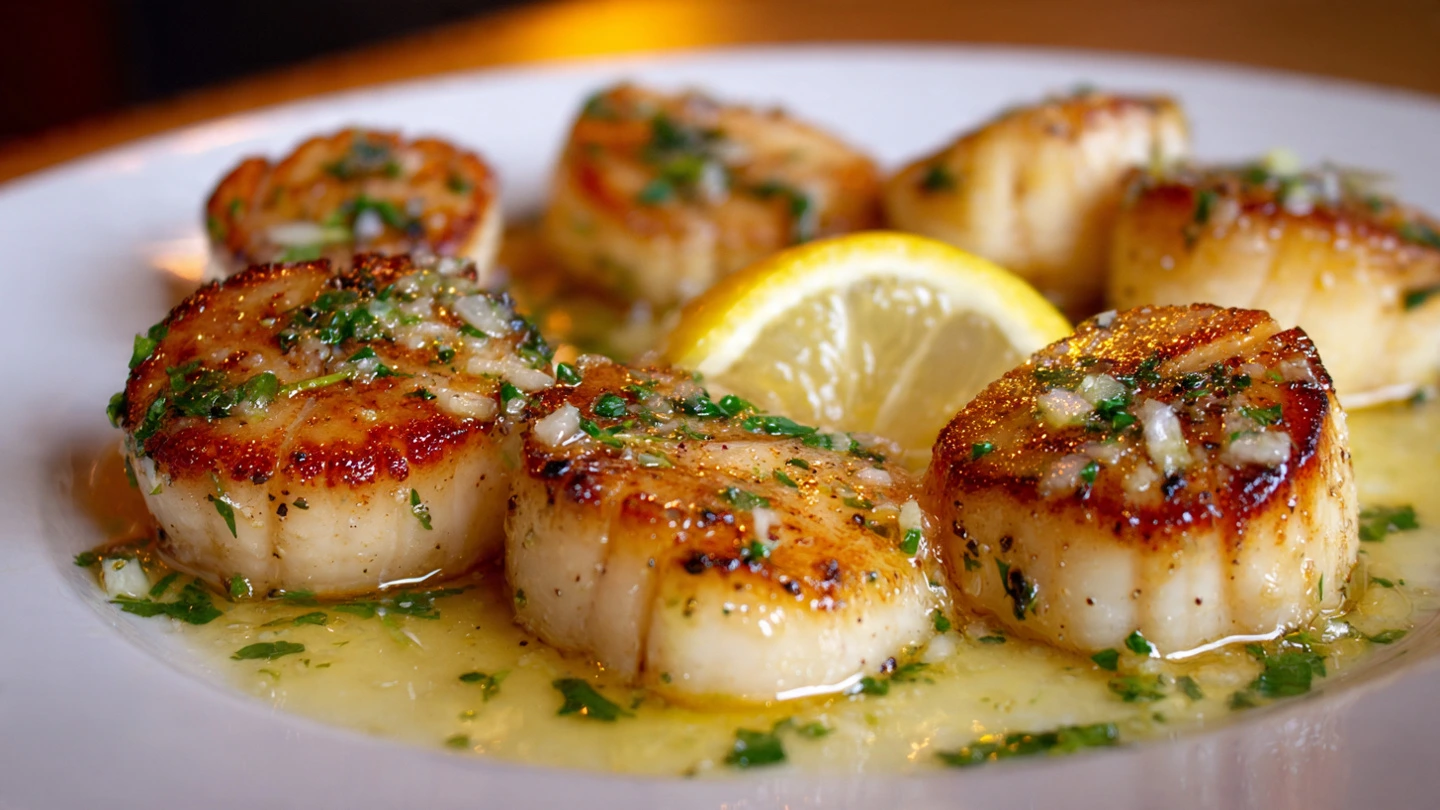
Seared scallops with a vibrant lemon butter sauce represent the pinnacle of simple elegance in the culinary world
. This dish, a staple in fine dining restaurants, is surprisingly achievable in the home kitchen, transforming a weeknight dinner into a gourmet experience
. The sweet, delicate flavor of the scallops, enhanced by a perfectly caramelized crust, is beautifully complemented by the rich, tangy notes of the lemon butter sauce
. This article will guide you through every step of creating this exquisite dish, from its historical roots and the science of its sauce to mastering the art of the sear, crafting luscious accompaniments, and presenting it like a professional, complete with creative variations and pairing suggestions to create a full, restaurant-quality meal .
From Haute Cuisine to Simple Sear: A Brief History
The journey of the scallop to its modern, pan-seared prestige is a story of evolving tastes on both sides of the Atlantic
In classic French gastronomy, the scallop, or Coquille Saint-Jacques, was historically prepared in a rich and elaborate style
. The quintessential dish, Coquilles St. Jacques, traditionally features poached scallops cloaked in a creamy white wine and mushroom sauce, served in their shells, and topped with breadcrumbs or cheese before being browned
. This method reflects the principles of classic haute cuisine, which favored complex sauces and intricate presentations
The shift towards simpler preparations began in the mid-20th century with the advent of nouvelle cuisine
. This culinary movement championed lighter dishes, fresher ingredients, and shorter cooking times, moving away from heavy, flour-thickened sauces
. Chefs began to favor pan sauces like beurre noisette (brown butter) and emulsified sauces like beurre blanc, which offered rich flavor without the weight of cream
. This new philosophy allowed the natural sweetness of the scallop to shine, leading to the rise of the simple pan-seared preparation
In the United States, the turning point came when “New American” cooking embraced the principles of nouvelle cuisine
. American chefs, inspired by the French emphasis on fresh, high-quality ingredients, began to showcase seafood in a more natural state, creating the perfect environment for the pan-seared scallop to become a fine-dining staple
The Allure of the Scallop
Scallops are bivalve mollusks found in saltwater environments worldwide . Their adductor muscle, the part we commonly eat, is responsible for opening and closing the shell . This muscle is what gives the scallop its characteristic round shape and tender, yet firm texture
. When cooked correctly, scallops are sweet, buttery, and melt in your mouth
Choosing Your Scallops: The Foundation of a Perfect Dish
The quality of your scallops is paramount to the success of this dish
. When at the fish counter, you’ll likely encounter two main types: sea scallops and bay scallops
. For searing, sea scallops are the preferred choice due to their larger size, which allows for a beautiful sear on the outside while keeping the inside tender and juicy
. Bay scallops, being much smaller, are better suited for other dishes
Within the world of sea scallops, the most crucial distinction is between “dry” and “wet” scallops
- Dry Scallops: These are scallops that have not been treated with any preservatives . They have a naturally sweet, briny flavor and a slightly tacky, translucent appearance . Because they haven’t absorbed excess water, they sear beautifully, developing a deep golden-brown crust . They are typically more expensive but are well worth the investment for their superior flavor and texture .
- Wet Scallops: These scallops have been soaked in a phosphate solution (sodium tripolyphosphate or STP) . This treatment causes them to absorb water, making them appear plumper and whiter . However, this excess moisture is released during cooking, making it nearly impossible to achieve a proper sear . Instead of caramelizing, they tend to steam in the pan, resulting in a pale, rubbery texture .
When purchasing fresh scallops, look for those that are ivory-colored with a pinkish or orange hue and have a firm, slightly moist texture
. They should smell sweet and of the ocean, not fishy or like ammonia
. If you’re using frozen scallops, it’s best to thaw them overnight in the refrigerator
The Perfect Sear: A Step-by-Step Guide
Achieving a perfect sear on a scallop is a technique that, once mastered, will elevate your cooking
. The goal is to create a deep, golden-brown crust on both sides while leaving the center tender and slightly translucent
Preparation is Key
- Remove the Side Muscle: Scallops have a small, tough side muscle (the “foot”) that attaches them to the shell . This muscle can be chewy, so it’s best to remove it by simply peeling it away with your fingers .
- Pat Them Dry, Then Dry Them Again: This is arguably the most critical step for a successful sear . Any moisture on the surface of the scallop will turn to steam in the hot pan, preventing the Maillard reaction—the chemical process responsible for that delicious browning—from occurring . Place the scallops on a plate lined with paper towels and pat the tops dry with another paper towel . For an even drier surface, you can salt the scallops and let them sit on the paper towels in the refrigerator for about 15 minutes . The salt will draw out excess moisture . Before cooking, give them one final pat dry .
The Searing Process
- Choose the Right Pan: A heavy-bottomed skillet, such as cast iron, stainless steel, or nonstick, is ideal for searing scallops . These pans retain heat well, which is crucial for a consistent sear .
- Get the Pan and Oil Screaming Hot: Heat your skillet over medium-high to high heat . Add a neutral oil with a high smoke point, such as canola, grapeseed, or avocado oil . You want the oil to be shimmering and just beginning to smoke before you add the scallops .
- Season and Sear: Season the scallops with salt and pepper right before you’re ready to cook them . Place them in the hot pan, seasoned-side down, ensuring you don’t overcrowd the pan . Leaving space between each scallop allows moisture to escape and prevents them from steaming .
- Don’t Touch!: Once the scallops are in the pan, resist the urge to move them . Let them cook undisturbed for about 1.5 to 3 minutes on the first side, depending on their size . You’ll know they’re ready to flip when a beautiful golden-brown crust has formed and they release easily from the pan .
- Flip and Finish with Butter: Use tongs to gently flip the scallops . Add a pat of unsalted butter to the pan . As the butter melts, you can tilt the pan and spoon the foaming butter over the scallops, a technique known as basting . This adds a rich, nutty flavor . The second side will need less time, typically 30 seconds to 2 minutes .
- Know When They’re Done: Overcooked scallops are a culinary tragedy, turning from tender to tough and rubbery . A perfectly cooked scallop will be opaque for the most part but still slightly translucent in the very center . They should feel firm to the touch but still have some spring .
The Luscious Lemon Butter Sauce
This simple pan sauce comes together in minutes and is the perfect finishing touch
. It is a classic example of an emulsion, a mixture of two liquids that don’t normally combine—in this case, fat (from the butter) and water (from the lemon juice)
. Understanding the science helps ensure a silky, cohesive sauce every time.
The Science of a Silky Sauce: Why It Breaks and How to Fix It
A “broken” or “separated” sauce occurs when the emulsion fails, leaving a greasy, curdled mess
Reasons a Sauce Breaks:
- Excessive Heat: This is the primary culprit . Butter is an emulsion of fat, water, and milk solids . When overheated (above 180-190°F), the milk proteins that act as emulsifiers denature, causing the butterfat to separate from the water .
- Incorrect Ratios or Rapid Addition: Adding butter too quickly, or adding melted butter instead of cold butter, can shock and overwhelm the emulsion, preventing it from forming properly .
- Acidity: Too much uncooked acid added directly to melted butter can cause the milk proteins to curdle .
Techniques to Prevent a Broken Sauce:
- Control the Temperature: Always make the sauce over low heat and never let it boil after adding the butter .
- Use Cold Butter: Add cold, cubed butter to a warm (not hot) liquid . This gradually lowers the sauce’s temperature as the butter melts, creating a stable emulsion .
- Whisk Constantly: Vigorous whisking breaks the fat into smaller droplets, allowing them to stay suspended in the liquid .
- Start with a Reduction: Reduce the liquids (lemon juice, wine) in the pan first . This concentrates flavor and provides a stable base for the butter to emulsify into .
How to Rescue a Broken Sauce:
- The Ice Cube Trick: Immediately remove the pan from the heat. Add an ice cube or a tablespoon of cold water and whisk vigorously . The rapid cooling can often bring the emulsion back together.
- The Cream Stabilizer: Whisk in a splash of heavy cream over very low heat . Its fat and protein content can help stabilize the emulsion.
- Restart with a Base: In a clean bowl, whisk an egg yolk or a teaspoon of Dijon mustard (both are powerful emulsifiers) . Very slowly, whisk the broken sauce into this new base to form a stable emulsion .
Seared Scallops with Lemon Butter Recipe
This recipe will guide you to creating restaurant-quality seared scallops in your own kitchen
Yields: 2-4 servings
Prep time: 10 minutes
Cook time: 10 minutes
Ingredients
- 1 to 1.5 lbs large dry sea scallops, side muscles removed
- 2 tablespoons olive oil or other neutral, high-smoke-point oil
- 3-4 tablespoons cold unsalted butter, cubed and divided
- 2-3 cloves garlic, minced
- 1/4 cup dry white wine (like Sauvignon Blanc) or chicken broth
- 2-3 tablespoons fresh lemon juice
- 2 tablespoons fresh parsley, chopped
- Salt and freshly ground black pepper to taste
Instructions
- Prepare the Scallops: Rinse the scallops and remove the side muscle . Thoroughly pat the scallops dry with paper towels . Season one side of the scallops with salt and pepper .
- Sear the Scallops: Heat a large cast iron or stainless steel skillet over medium-high heat . Add the olive oil . Once the oil is shimmering, carefully place the scallops in the pan, seasoned-side down, without overcrowding .
- Cook Undisturbed: Sear for 1.5 to 3 minutes, without moving them, until a deep golden-brown crust forms . Season the top side of the scallops while the first side cooks .
- Flip and Finish: Flip the scallops . Add 1-2 tablespoons of the butter to the pan . As it melts, tilt the pan and spoon the butter over the scallops . Cook for another 30 seconds to 2 minutes, until opaque but still tender . Remove the scallops from the pan, transfer to a plate, and tent with foil to keep warm .
- Make the Sauce Base: Reduce the heat to low . Add the minced garlic and cook for 30-60 seconds until fragrant, being careful not to burn it .
- Deglaze and Emulsify: Pour in the white wine and fresh lemon juice, scraping up any browned bits (fond) from the bottom of the pan . Allow the sauce to simmer and reduce by about half. Remove the pan from the heat and whisk in the remaining 2 tablespoons of cold butter, one piece at a time, until the sauce is creamy .
- Serve Immediately: Stir in the fresh parsley . Return the scallops to the pan to coat, or pour the sauce over them on a serving platter . Serve immediately .
Mastering the Presentation: The Art of Plating
Transforming a simple plate of scallops into a fine-dining experience hinges on thoughtful presentation
. The goal is to create a visually stunning plate that highlights the golden-brown crust and delicate texture of the scallops
Arranging the Scallops
- The Rule of Odds: For a more natural and visually appealing composition, arrange scallops in odd numbers, such as three or five .
- Off-Center Placement: Instead of centering the scallops, position them slightly off-center to create a more dynamic and artistic look, following the “rule of thirds” used in visual arts .
- Create Height and Dimension: Add dimension by serving the scallops on top of a purée or risotto, or by staggering them slightly rather than placing them in a perfectly straight line .
- Showcase the Sear: When arranging the scallops, make sure the beautifully seared golden-brown side is facing up to showcase your cooking technique .
Saucing the Plate
The lemon butter sauce should complement the dish without overwhelming it
- The Swoosh or Smear: Place a spoonful of sauce (or a thicker purée) on the plate and use the back of the spoon to drag it in a confident arc or “swoosh” for a classic restaurant touch .
- Dots and Drizzles: Use a squeeze bottle or the tip of a spoon to create delicate dots of sauce in a pattern, or to create an elegant spiral or drizzle .
- The Pool: A simple yet effective method is to pool the sauce in the center or to one side of the plate and then arrange the scallops in or around it .
- Basting: After plating, you can spoon any remaining warm sauce over the scallops to give them a final gloss .
Elevating with Garnishes
Garnishes should add a fresh element of color, texture, and flavor
- Fresh Herbs: Finely chopped fresh parsley, chives, or dill add a touch of color and a fresh, herbaceous note .
- Microgreens and Edible Flowers: For a delicate and elegant finish, a few carefully placed microgreens or edible flowers add sophistication .
- Citrus Zest: A final grating of fresh lemon zest over the dish enhances the aroma and bright citrus flavor .
- Crispy Elements: To add a contrasting texture, consider a garnish of crispy fried leeks or shallots .
Choosing Your Canvas
The plate serves as the canvas for your dish
. Neutral-colored plates, such as white or black, especially with a matte finish, will make the golden scallops and colorful garnishes stand out . The shape also influences the presentation; round plates offer a classic feel, while rectangular or asymmetrical plates can provide a more modern aesthetic
Elevating the Classic: Sauce Variations
While the classic lemon butter sauce is a masterpiece of simplicity, it also serves as a perfect canvas for other flavors
. Adding fresh herbs or briny capers can transform the dish into a new and exciting experience
Variation 1: Lemon Dill Butter Sauce
Adding fresh dill introduces a bright, slightly grassy, and subtly herbaceous finish that enhances the seafood’s natural sweetness without overpowering it
. The dill provides a fresh, aromatic quality with hints of anise and celery, lending a delicate, summery flavor to the dish
Yields: 2 servings
Cook time: 10-12 minutes
Ingredients
- 12 large dry sea scallops
- 3 tbsp unsalted butter, divided and chilled
- 1/4 cup finely chopped shallots
- 1/2 cup dry white wine (like Sauvignon Blanc)
- 1 tbsp chopped fresh dill
- 1 tbsp fresh lemon juice
- 1 tsp grated lemon peel
- Salt and freshly ground pepper to taste
Instructions
- Prepare and Sear Scallops: Pat the scallops completely dry and season on both sides with salt and pepper . In a large skillet over medium-high heat, melt 1 tablespoon of butter. Sear the scallops for 1-2 minutes per side, until a golden-brown crust forms . Transfer to a plate and tent with foil .
- Sauté Aromatics: Melt another tablespoon of butter in the same skillet over medium heat. Add the chopped shallots and sauté for about 1 minute until softened .
- Deglaze and Reduce: Pour in the white wine, scraping up any browned bits. Bring to a boil and cook until the wine has reduced by half, about 1-2 minutes .
- Finish the Sauce: Remove the pan from the heat. Stir in the chopped dill, lemon juice, and lemon peel . Add the final tablespoon of chilled, cubed butter and whisk continuously until the sauce is creamy . Do not let it boil .
- Serve: Season the sauce with salt and pepper to taste. Pour the sauce over the seared scallops and serve immediately .
Variation 2: Lemon Caper Butter Sauce
Capers introduce a tangy, briny, and salty punch that cuts through the richness of the butter, creating a sauce with bold, piquant flavor notes reminiscent of Italian piccata dishes
. This combination results in a complex, savory sauce that elevates the scallops with a sophisticated, restaurant-quality taste
Yields: 2 servings
Cook time: 10-15 minutes
Ingredients
- 1 lb large dry sea scallops
- 3 tbsp unsalted butter, divided
- 1-2 cloves garlic, minced
- 1/2 cup dry white wine or chicken broth
- 2 tbsp capers, rinsed and drained
- 2 tbsp fresh lemon juice
- 1 tbsp fresh parsley, chopped (for garnish)
- Salt and freshly ground pepper to taste
Instructions
- Prepare and Sear Scallops: Pat the scallops dry and season with salt and pepper. In a large skillet over medium-high heat, melt 1 tablespoon of butter. Sear the scallops for 2-3 minutes per side until golden brown . Remove from the skillet and set aside.
- Build the Sauce Base: Reduce the heat to medium. Add 1 tablespoon of butter and the minced garlic to the pan, cooking for about one minute until fragrant . Add the rinsed capers and cook for another minute to let them bloom in the butter .
- Deglaze and Reduce: Add the white wine or broth to deglaze the pan, scraping up any flavorful bits . Simmer until the liquid has reduced by about half, around 3-5 minutes .
- Incorporate Flavors: Stir in the lemon juice and continue to cook until the sauce thickens slightly, another 2-3 minutes .
- Finish and Serve: Turn off the heat and whisk in the final tablespoon of cold butter until the sauce is glossy . Return the scallops to the pan to coat them. Garnish with fresh parsley and serve immediately .

Perfect Pairings and Side Dishes
A well-chosen side dish can elevate your seared scallops into a complete and satisfying meal. Creamy textures provide a wonderful contrast to the seared crust of the scallop.
Side Dish Recipe: Creamy Parmesan Risotto
A creamy, well-executed risotto is a sublime partner for seared scallops, providing the perfect bed for their sweet flavor
. The key to its texture lies in using the right rice and technique
Yields: 4 servings
Prep time: 10 minutes
Cook time: 25-30 minutes
Ingredients
- 6 cups low-sodium chicken or vegetable stock
- 1 tablespoon olive oil
- 2 tablespoons unsalted butter, divided
- 1 large shallot, finely chopped
- 2 cloves garlic, minced
- 1 ½ cups Arborio rice (do not rinse)
- ½ cup dry white wine (like Sauvignon Blanc or Pinot Grigio)
- 1 cup freshly grated Parmigiano-Reggiano cheese
- Salt and freshly ground black pepper to taste
- Fresh parsley, chopped (for garnish, optional)
Instructions
- Warm the Stock: In a medium saucepan, bring the stock to a simmer over low heat. Keep it warm throughout the cooking process to avoid shocking the rice and hindering starch release .
- Sauté Aromatics: In a large, heavy-bottomed pot, heat the olive oil and 1 tablespoon of butter over medium heat. Add the shallot and cook until softened, about 3-4 minutes . Add the garlic and cook for another minute until fragrant .
- Toast the Rice (Tostatura): Add the Arborio rice and stir constantly for about 2 minutes. This crucial step, known as tostatura, toasts the grains, helping them absorb liquid evenly and adding a nutty flavor . The grains will become translucent around the edges with a white, opaque center .
- Deglaze with Wine: Pour in the white wine and stir continuously until it has been completely absorbed .
- Gradual Addition of Stock: Add the warm stock one ladleful (about ¾ cup) at a time, stirring frequently . Allow each addition to be almost fully absorbed before adding the next. This slow process encourages the rice to release its starches, creating the signature creamy consistency .
- Test for Doneness: After about 18-20 minutes, start tasting the rice. It should be al dente—tender with a slight chew in the center . The texture should be fluid and creamy, not stiff .
- Finish (Mantecatura): Remove the pot from the heat. Vigorously stir in the remaining tablespoon of cold butter and the grated Parmesan cheese . This final step, called mantecatura, makes the risotto exceptionally creamy and glossy . Season with salt and pepper.
- Serve Immediately: Risotto is best served immediately as it thickens upon sitting . To time this with the scallops, begin searing them when the risotto is about 5 minutes from being finished .
Side Dish Recipe: Simple Roasted Asparagus
Roasting asparagus brings out its natural sweetness and earthy flavors, making it a simple and elegant side . For best results, use thicker spears, which will remain tender-crisp after roasting
Yields: 4 servings
Prep time: 5 minutes
Cook time: 10-12 minutes
Ingredients
- 1 pound asparagus, woody ends trimmed
- 1-2 tablespoons extra-virgin olive oil
- 2 cloves garlic, minced
- Kosher salt and freshly ground black pepper to taste
- Optional: Squeeze of fresh lemon juice or a sprinkle of Parmesan cheese for serving
Instructions
- Preheat your oven to 400-425°F (205-220°C) .
- On a baking sheet, toss the asparagus with olive oil, minced garlic, salt, and pepper until evenly coated .
- Arrange the asparagus in a single layer to ensure they roast rather than steam .
- Roast for 10-12 minutes, or until the asparagus is tender and lightly browned .
- If desired, finish with a squeeze of lemon juice or a sprinkle of Parmesan cheese before serving .
Side Dish Recipe: Creamy Garlic Mashed Potatoes
Creamy mashed potatoes offer a comforting and flavorful base that pairs beautifully with the rich scallops and tangy sauce .
Yields: 4-6 servings
Prep time: 10 minutes
Cook time: 20-25 minutes
Ingredients
- 2.5 pounds Yukon Gold or Russet potatoes, peeled and cut into 1-inch chunks
- 1 cup whole or 2% milk
- 8 tablespoons (1 stick) unsalted butter
- 6 cloves garlic, smashed and peeled
- 1 tablespoon plus 1 teaspoon kosher salt, divided
- Optional garnish: finely chopped fresh chives
Instructions
- In a small saucepan, gently heat the milk, butter, smashed garlic, and 1 teaspoon of salt over low heat until the butter is melted . Cover and keep warm to allow the garlic to infuse the liquid .
- Place the potatoes in a medium saucepan, cover with cold water, and add the remaining 1 tablespoon of salt . Bring to a boil and cook for 15-20 minutes, until very tender and easily pierced with a fork .
- Drain the potatoes well and return them to the hot pot .
- Strain the warm, infused milk mixture through a fine-mesh strainer into the potatoes, discarding the garlic cloves .
- Mash the potatoes until smooth and creamy, being careful not to overmix, which can make them gluey .
- Garnish with fresh chives if desired and serve immediately .
A Healthy Indulgence: Scallop Nutrition and Safety
Sea scallops are not only a delicacy but are also considered one of the healthiest types of seafood
Nutritional Profile and Health Benefits
Scallops are a fantastic source of lean protein, composed of about 80% protein with a very low fat content, which can help you feel full longer and aid in weight management
. A 3.5-ounce (100-gram) serving of cooked sea scallops contains approximately 137 calories, 24 grams of protein, and less than 1 gram of fat
They are packed with essential vitamins and minerals:
- Heart Health: Scallops are rich in omega-3 fatty acids, which support heart health by helping to balance cholesterol levels . They are also an excellent source of magnesium and potassium, minerals that help relax blood vessels, which can lower blood pressure and improve circulation .
- Brain Function: The combination of omega-3 fatty acids and high levels of Vitamin B12 is crucial for a healthy nervous system and proper brain function . A single serving provides over 100% of the daily value for B12 .
- Immune and Thyroid Support: Scallops are a good source of zinc and selenium, minerals that are important for a healthy immune system and proper thyroid function .
- Bone and Muscle Health: The high protein content aids in muscle repair, while minerals like phosphorus, calcium, and magnesium contribute to bone strength and can help with muscle cramps .
Critical Food Safety Guidelines
Proper handling of scallops is crucial to avoid foodborne illness
- Purchasing: Always buy scallops from a reputable source . Fresh, shucked scallops should have a pale beige to creamy pink color and a firm texture . They should have a clean, oceanic smell, not a strong fishy one . Avoid any that are pure white, as this may indicate treatment with a water-retaining chemical solution .
- Storage: Refrigerate fresh scallops immediately at a temperature below 40°F (4°C) and use them within one to two days . Store them in a covered container on the bottom shelf of the refrigerator . Do not store them in water . Frozen scallops can be stored for 2-4 months and should be thawed in the refrigerator before use .
- Handling: Wash your hands before and after handling raw shellfish . Use separate cutting boards, plates, and utensils for raw and cooked scallops to prevent cross-contamination .
- Preparation: Before cooking, scrub and clean shells if you bought them live . For shucked scallops, be sure to remove the small, tough side-muscle, which can be chewy . It is also recommended to consume only the adductor muscle and remove the viscera (guts), as contaminants can accumulate there .
- Cooking: Cook scallops until the meat is firm and opaque white throughout . Overcooking will make them tough and rubbery .
Perfect Wine Pairings
Select a wine with enough acidity to complement the citrus and cut through the butter’s richness without overpowering the delicate scallops
- Sauvignon Blanc: A classic choice, with high acidity and vibrant citrus notes that cleanse the palate .
- Chardonnay (Unoaked or Lightly Oaked): A crisp, unoaked Chardonnay mirrors the sauce’s citrus notes, while a lightly oaked version can harmonize with its buttery richness .
- Pinot Grigio: A crisp Italian Pinot Grigio with notes of green apple and lemon is an excellent choice for creamy seafood dishes .
- Albariño: This Spanish wine boasts high acidity and a slight salinity that enhances the scallops‘ natural flavor .
Frequently Asked Questions (FAQ)
Q: Why didn’t my scallops get a good sear?
A: The most common reasons are: 1) using “wet” scallops that retain too much moisture
; 2) not drying them thoroughly enough before cooking
; 3) the pan was not hot enough
; or 4) overcrowding the pan, which causes the scallops to steam instead of sear
Q: Why are my scallops rubbery?
A: You likely overcooked them
. Scallops cook very quickly. A perfectly cooked scallop should be opaque but still slightly translucent in the very center
Q: Can I use frozen scallops?
A: Yes. For best results, thaw them overnight in the refrigerator
. Before cooking, ensure they are completely thawed and pat them extremely dry to remove all excess moisture
Q: My lemon butter sauce broke! How do I fix it?
A: Immediately remove the pan from the heat. Try whisking in an ice cube or a tablespoon of cold water
. This rapid cooling can often bring the emulsion back together. For more tips, refer to the “How to Rescue a Broken Sauce” section above.
Q: Are sea scallops healthy?
A: Yes, they are very healthy. They are a low-calorie, low-fat source of lean protein and are rich in heart-healthy omega-3 fatty acids, Vitamin B12, magnesium, and potassium
Q: How do I store and reheat leftover scallops?
A: Store leftovers in an airtight container in the refrigerator for up to two days
. Reheat gently in a warm oven or for a very short time in a skillet over low heat to avoid making them rubbery . Avoid the microwave