
Introduction
There are few dishes as universally loved, celebrated, and devoured as a giant platter of nachos
. It’s the ultimate party food, the perfect companion for game day, and, when you’re short on time and inspiration, a surprisingly easy weeknight hero
. But forget the sad, soggy piles of chips with unevenly melted cheese
. We’re talking about the pinnacle of nacho perfection: Sheet Pan Nachos
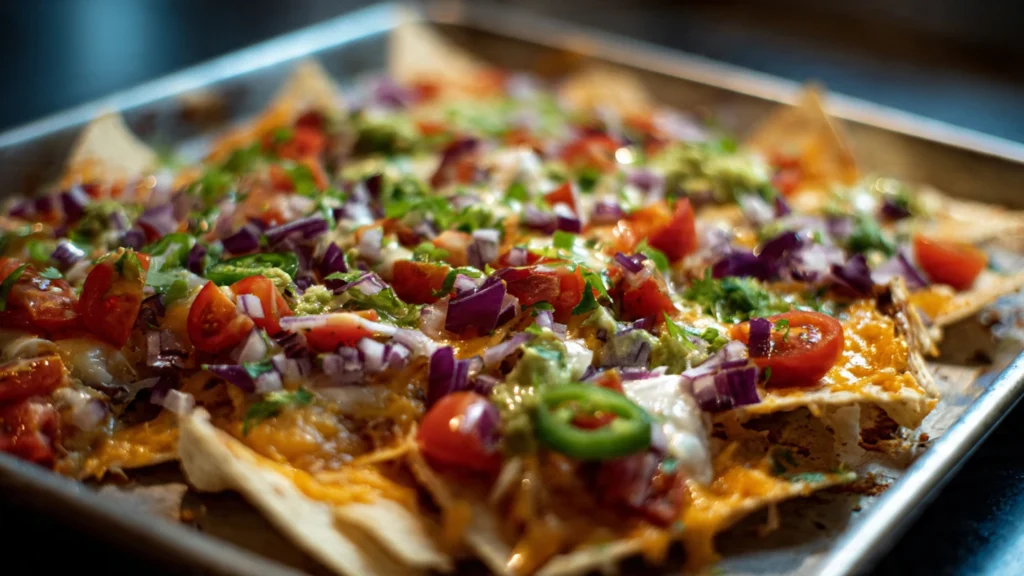
Imagine a sprawling canvas of crispy tortilla chips, each one generously loaded with seasoned meat or beans, blanketed in a glorious layer of perfectly melted cheese, and baked to absolute perfection
. The beauty of making nachos on a sheet pan is its simplicity and efficiency
. Everything cooks on one pan, which means every chip gets its moment in the sun (or oven, rather), and cleanup is an absolute breeze
This guide is your new best friend for creating the most epic, crowd-pleasing sheet pan nachos you’ve ever had
. We’ll walk you through a foolproof recipe, share secrets to avoid the dreaded soggy chip, explore endless topping possibilities, and provide variations to suit every taste and diet, from classic beef to Buffalo chicken and hearty vegan options
. But first, let’s pay homage to the simple, brilliant snack that started it all.
A Brief History of a Legendary Snack
The story of nachos begins not in a giant stadium, but in a small-town restaurant in 1943
. In the city of Piedras Negras, Mexico, just across the border from Eagle Pass, Texas, a group of U.S. military wives arrived at the Victory Club looking for a bite to eat
. The restaurant’s cook was nowhere to be found, but the maître d’, a man named Ignacio Anaya, refused to turn the hungry customers away
Thinking on his feet, Ignacio—affectionately known as “Nacho”—went into the kitchen and improvised with what he had on hand
. He took freshly fried corn tortilla pieces (tostadas), topped them with shredded longhorn or Colby cheese and slices of pickled jalapeño, and heated them just until the cheese was melted
. When one of the women asked what the dish was called, he famously replied, “Well, I guess we can just call them Nacho’s Special”
. The name was later shortened to “nachos,” and a culinary legend was born
For decades, this simple, three-ingredient recipe was the standard
. The major evolution came in the 1970s when Frank Liberto developed a shelf-stable cheese sauce, making it possible to serve nachos quickly to massive crowds at venues like Arlington Stadium
. This “ballpark nacho” opened the floodgates for the “loaded” nachos we know and love today, transforming the simple snack into a canvas for endless toppings and leading directly to modern, shareable creations like the sheet pan nachos you’re about to make
The Foundation: Building Your Perfect Nacho Base
Before we get to the fun part (piling on the toppings!), let’s talk about the essential components that make or break your nacho experience.
Choosing Your Chips Wisely
This is not the time for thin, delicate tortilla chips
. You need a chip with integrity, one that can stand up to the weight of all the deliciousness you’re about to load on top
. Look for thick-cut, sturdy, restaurant-style tortilla chips
. These are engineered for dipping and scooping and will hold their crunch beautifully in the oven
. The original nachos were made with freshly fried tortilla triangles, but good quality store-bought chips are a fantastic and convenient base
The Secret to Melty, Dreamy Cheese
The cheese is arguably the most crucial element . For that perfect, ooey-gooey, stretchy cheese pull, a combination of cheeses is your best bet
- Best for Melting: Monterey Jack is the superstar of melty cheeses . It’s creamy, mild, and melts incredibly smoothly . Colby Jack and Oaxaca cheese are also fantastic options for achieving that coveted lava-like flow . In a nod to the original, a mild Longhorn or Colby cheese also works wonderfully .
- Best for Flavor: A medium or sharp cheddar adds that classic, tangy nacho flavor we all crave .
- A Spicy Kick: If you like a little heat, Pepper Jack is a perfect all-in-one choice, providing both meltiness and spice .
Pro Tip: For the absolute best melt, grate your own cheese from a block
. Pre-shredded cheeses are often coated in starches like cellulose or other anti-clumping agents to prevent them from sticking together in the bag, which can inhibit a smooth, glorious melt and sometimes lead to a greasy texture
Homemade Taco Seasoning: The Secret to Unforgettable Flavor
To truly elevate your nachos, skip the store-bought packets and make your own taco seasoning
. It’s quick, easy, and the difference in taste is astounding.
Advantages of Homemade vs. Store-Bought
- Superior Flavor: Using fresh, quality spices results in a more vibrant and robust taste compared to pre-packaged options .
- Ingredient Control: You control the salt levels and avoid the fillers, anti-caking agents, MSG, and hidden sugars often found in commercial blends .
- Customizable: Easily adjust the heat and flavor to your exact preference . Like it smokier? Add more smoked paprika. Want more heat? Up the cayenne .
- Cost-Effective: Making your own seasoning from bulk spices is more economical in the long run than buying individual packets .
From-Scratch Taco Seasoning Recipe
This recipe yields about 2-3 tablespoons, the perfect amount for one pound of ground beef .
Ingredients:
- 1 tablespoon chili powder
- 1 ½ teaspoons ground cumin
- 1 teaspoon smoked paprika
- ½ teaspoon garlic powder
- ½ teaspoon onion powder
- ½ teaspoon dried oregano (Mexican oregano is a great choice if you have it)
- ½ teaspoon fine sea salt
- ¼ teaspoon black pepper
- ⅛ to ¼ teaspoon cayenne pepper or red pepper flakes (adjust to your heat preference)
Instructions:
In a small bowl, combine all the spices and mix until well blended
. Store in an airtight container.
The Flavor Role of Each Spice:
- Chili Powder: The foundation of the blend, providing a deep, earthy, and slightly sweet flavor with mild heat .
- Ground Cumin: Adds the characteristic warm, nutty, and savory flavor essential to any taco seasoning .
- Smoked Paprika: Contributes a beautiful color and a complex, smoky flavor that adds incredible depth .
- Garlic & Onion Powder: These aromatics provide a savory, foundational base that complements the other spices .
- Dried Oregano: Adds a peppery, earthy, and slightly bitter note that balances the richness. Mexican oregano offers a brighter, more citrusy flavor .
- Salt & Black Pepper: Salt is crucial for enhancing all the other flavors, while black pepper adds a mild, pungent heat .
- Cayenne Pepper / Red Pepper Flakes: This is your primary heat source. A little goes a long way in providing a pleasant kick .
The Ultimate Sheet Pan Nacho Recipe
This recipe is your blueprint for building the perfect pan of nachos. We’ll detail the assembly process here, with protein and themed variations discussed in the next section.
Yields: 4-6 servings
Prep time: 15 minutes
Cook time: 10-15 minutes
Ingredients
- 1 large bag (12-14 oz) of sturdy, thick-cut tortilla chips
- 3-4 cups shredded cheese (a mix of Monterey Jack and cheddar is recommended)
- 1 recipe of your chosen cooked protein (see Protein Power section below) or beans
- Optional additions for baking: 1/2 cup sliced black olives, 1/2 cup diced red onion, 1/4 cup sliced jalapeños (fresh or pickled)
- Assorted fresh toppings for serving (see Topping Bar section below)
Step-by-Step Assembly Instructions
- Preheat and Prep: Preheat your oven to 400°F (200°C) . Line a large, rimmed baking sheet with parchment paper or aluminum foil for easy cleanup . For extra crispy bottom chips, place a wire rack on top of the baking sheet and build your nachos on the rack; this allows air to circulate underneath .
- Prepare Your Protein: Cook your chosen protein—ground beef, shredded chicken, or a themed variation—according to the instructions in the “Protein Power” section below . For a vegetarian option, have your seasoned beans or vegetables ready, ensuring they are well-drained to avoid excess moisture .
- The Art of Layering (The Anti-Soggy Method): This is the most critical step for crunchy nacho success . Experts agree that two layers are ideal to ensure everything stays crispy and every chip is loaded .
- Layer 1 – Chips: Spread half of your tortilla chips in a single, even layer on the prepared baking sheet, avoiding too much overlap .
- Layer 2 – Cheese Barrier: Sprinkle about a third of your cheese directly onto this first layer of chips . This creates a “waterproof” barrier that protects the chips from the toppings .
- Layer 3 – Hot Toppings: Evenly distribute half of your cooked protein (or beans) and any other “hot” toppings like onions or olives over the cheese .
- Layer 4 – Repeat: Add the remaining tortilla chips, followed by the rest of your protein/beans, and finally, top everything with the remaining shredded cheese, making sure to get good coverage to the edges .
- Bake to Perfection: Place the sheet pan in the preheated oven and bake for 8-12 minutes . You’re looking for the cheese to be completely melted, bubbly, and just starting to turn golden brown at the edges . Keep a close eye on them, as they can go from perfect to burnt quickly .
- Garnish and Serve Immediately: Remove the nachos from the oven . This is where you add all your fresh, cool toppings, or better yet, serve them on the side . Let everyone dig in while they’re hot and crispy .
Protein Power & Themed Variations
Your choice of protein sets the flavor foundation for your nachos. Here are a few fantastic options, from classic preparations to fun, themed extravaganzas.
Classic Seasoned Ground Beef
- Heat 1 tbsp of olive oil in a large skillet over medium-high heat .
- Add 1 lb of lean ground beef and cook, breaking it up with a spoon, until browned . Drain off any excess fat.
- Stir in 2-3 tbsp of the homemade taco seasoning (from the recipe above) and about 1/2 to 2/3 cup of water .
- Simmer for a few minutes until the liquid has reduced and the meat is well-seasoned and coated .
Perfectly Seasoned Shredded Chicken
The key to great chicken nachos is flavorful, moist chicken that won’t make your chips soggy
. A rotisserie chicken is a great time-saver
- Skillet-Sauté Method (Fast & Flavorful): Pat two boneless, skinless chicken breasts dry and coat them generously with a seasoning blend (chili powder, cumin, garlic powder, smoked paprika) . Sear in an oiled skillet for 4-6 minutes per side until cooked through (165°F) . Let rest, then shred with two forks .
- Poaching Method (Tender & Moist): Place chicken breasts in a saucepan and cover with water or chicken broth . Bring to a boil, then reduce to a simmer and cook for 10-12 minutes until done . Remove and shred . To add flavor, you can toss the shredded chicken with a bit of salsa or a reduced sauce .
Themed Nacho Extravaganzas
1. Buffalo Chicken Nachos
This popular variation brings the beloved flavor of Buffalo wings to a shareable platter
- Chicken Prep: In a bowl, toss 1 lb (about 3 cups) of cooked, shredded chicken with 1/2 cup of your favorite buffalo sauce (like Frank’s RedHot), 1/4 cup of ranch or blue cheese dressing, and 1 tbsp of melted butter until well-coated .
- Cheese: Use a blend of Colby Jack or Monterey Jack, and add 1/2 cup of crumbled blue cheese for that classic, pungent flavor .
- Assembly: Layer chips, buffalo chicken, and cheeses on your sheet pan . Bake at 400°F (200°C) for 5-10 minutes until bubbly .
- Toppings: Garnish with sliced green onions, diced celery, and an extra drizzle of ranch or blue cheese dressing .
2. Pork-Free Breakfast Nachos
Start your day with a fun, savory dish that combines the best of breakfast with the joy of nachos
- Protein Prep: In a skillet, cook 1 lb of ground turkey sausage or 1/2 lb of beef chorizo until browned, breaking it up with a spoon . Drain any excess grease .
- Eggs: You can either scramble 6 large eggs separately and add them before baking, or create wells in the toppings and crack fresh eggs directly onto the nachos before they go in the oven for a “baked egg” style .
- Assembly: On a baking sheet set to 375°F (190°C), layer chips, cooked protein, eggs, and 1 can of rinsed black beans . Top with shredded cheddar or a Mexican cheese blend and diced red onion .
- Bake & Top: Bake for 7-10 minutes until the cheese is melted . Top with diced avocado, tomatoes, cilantro, salsa, and sour cream .
Hearty Vegetarian & Vegan Nacho Creations
Creating deeply flavorful and satisfying vegetarian and vegan nachos is all about building layers of texture and taste.
Flavorful & Hearty Plant-Based Protein Layers
- Seasoned Black Beans: To prevent soggy nachos, it’s crucial to prepare the beans correctly . Sauté minced garlic and onion, then add a can of rinsed black beans with spices like cumin, chili powder, and smoked paprika . To create a thicker consistency that clings to the chips, partially mash the beans with a potato masher . Simmer until the mixture has thickened and is no longer watery .
- Spicy Roasted Cauliflower: For a unique topping, toss small cauliflower florets with olive oil, hot sauce, and spices like chili powder, cumin, and onion powder . Roast on a sheet pan at 425°F (220°C) for 25-35 minutes until tender and slightly browned .
- “Pulled” Jackfruit: Use young, green jackfruit canned in brine or water for a convincing “pulled” texture . Drain, rinse, and shred the pieces with a fork . Sauté the shredded jackfruit with onions, garlic, and your favorite taco seasonings or BBQ sauce . Simmer with a little vegetable broth until tender and flavorful, about 15-20 minutes .
- Other Plant-Based Options: You can also use plant-based meat crumbles or sautéed mushrooms for a hearty, savory layer .
The Ultimate Vegan ‘Cheese’ for Nachos
Homemade Meltable Vegan Nacho Cheese Sauce
This creamy, “cheesy” sauce is a game-changer for vegan nachos
- Ingredients:
- 1 cup raw cashews, soaked in hot water for at least 15 minutes
- 1/4 to 1/2 cup nutritional yeast
- 1 tbsp lemon juice
- 1/2 tsp each of garlic powder, onion powder, and smoked paprika
- Optional: Pinch of turmeric for color, 1 tbsp pickled jalapeño slices plus brine for tang
- 3/4 to 1 cup water or unsweetened plant milk
- Salt to taste
- Technique: Drain the soaked cashews. Combine all ingredients in a high-speed blender and blend until completely smooth and creamy . For a warm sauce, gently heat it in a saucepan over medium-low heat, stirring constantly .
Recommended Store-Bought Vegan Cheeses That Melt
For a convenient option, several brands offer vegan cheese shreds that melt well in the oven
- Violife: Often praised for its melting capabilities and creamy texture, with cheddar and mozzarella shreds being excellent choices .
- Follow Your Heart / Field Roast Chao: These brands are also known for great flavor and a gooey, creamy melt .
- Daiya: A widely available option whose Cutting Board shreds have an improved melt and stretch .
- Siete: Offers a dairy-free cashew queso that is great for drizzling over nachos after baking .
The Ultimate Topping Bar: A Universe of Flavor
The baked nachos are just the beginning
. The real magic happens when you load them up with fresh, vibrant toppings
. Serving these on the side in small bowls creates a fun, customizable “nacho bar” and is the number one strategy to prevent sogginess
Classic Must-Haves
- Pico de Gallo: Finely dice 4-5 Roma tomatoes (seeds removed), 1/2 white or red onion, and 1 jalapeño (seeds removed for less heat) . Mix in a bowl with 1/4 cup chopped fresh cilantro, the juice of 1-2 limes, and salt to taste . Let it sit for at least 15 minutes .
- Guacamole: Mash 3 ripe avocados in a bowl . Stir in 1/2 cup finely diced red onion, 1/4 cup chopped cilantro, 1 minced garlic clove, 1 finely minced jalapeño, the juice of a lime, and salt .
- Sour Cream or Mexican Crema: A cool, tangy drizzle is essential . Greek yogurt is also a great substitute .
- Pickled Jalapeños & Fresh Cilantro: For heat, acidity, and a fresh herbal note .
Next-Level Salsas & Drizzles
- Corn and Black Bean Salsa: Combine a can of black beans (rinsed) and a can of corn (drained) with diced red onion, jalapeño, and fresh cilantro . Dress with lime juice, a touch of olive oil, and a sprinkle of cumin and chili powder .
- Vibrant Mango Salsa: For a sweet and spicy kick, combine diced ripe mango with diced red bell pepper, red onion, cilantro, and minced jalapeño .
- Smoky Chipotle-Lime Crema: In a blender, combine 1 cup of sour cream, one or two canned chipotle peppers in adobo sauce, the juice and zest of one lime, and a clove of garlic . Blend until smooth .
- Other Creative Toppings: Consider adding pickled red onions, sliced radishes, or different types of salsa to your spread .
Frequently Asked Questions (FAQ) for Nacho Nirvana
Here are answers to the most common questions to ensure your sheet pan nachos are perfect every time.
Q1: How do I prevent my sheet pan nachos from getting soggy?
This is the most common nacho pitfall, but it’s entirely avoidable
- Use Sturdy Chips: Start with thick, restaurant-style chips that won’t buckle under the weight of the toppings .
- Create a Cheese Barrier: A layer of cheese applied directly to the chips acts as a shield against moisture from other toppings .
- Drain Ingredients: Thoroughly drain any wet ingredients like beans, olives, or jalapeños before adding them .
- Serve Wet Toppings on the Side: This is the most important rule. Salsa, guacamole, and sour cream should be served in bowls for dipping or adding to individual servings .
- Use a Wire Rack: For maximum crispiness, assemble and bake the nachos on a wire rack set inside the baking sheet. This promotes air circulation and keeps the bottom layer from steaming .
Q2: My cheese gets greasy or burns. How do I get a perfect melt?
- Grate Your Own Cheese: Pre-shredded cheese contains anti-caking agents that can make it melt unevenly or become greasy . Grating from a block is best.
- Use the Right Cheese: A blend of a good melting cheese like Monterey Jack with a flavorful one like medium cheddar is ideal .
- Bake, Don’t Broil (Carelessly): A moderate oven temperature around 400°F (200°C) melts the cheese perfectly without burning the chips . If you want a golden-brown finish, you can broil for a few seconds at the very end, but watch it like a hawk—it can burn in an instant .
Q3: How can I ensure my nachos heat evenly?
- Don’t Overcrowd the Pan: Spread the chips in a single, even layer with minimal overlap . This allows hot air to circulate around more chips. If you’re making a large batch, it’s better to use two sheet pans than to pile one high .
- Distribute Toppings Evenly: Make sure to spread the protein, beans, and cheese evenly over the entire surface so every bite is a good one .
Q4: What’s the best way to reheat leftover nachos?
While nachos are always best fresh, you can revive them. The key is to avoid the microwave at all costs, as it will create steam and make the chips soggy
- Oven or Toaster Oven: This is the best method . First, scrape off any cold toppings like sour cream or guacamole . Spread the nachos in a single layer on a baking sheet and reheat in a 275-300°F (135-150°C) oven for 5-10 minutes, or until crispy and warmed through .
- Air Fryer: For a quick alternative, an air fryer works wonders. Reheat at 375°F for 3-4 minutes until crisp .
Q5: I’m making sheet pan nachos for a party. How can I prep ahead?
A solid prep plan makes party day a breeze
- Up to 2 Days Ahead: Cook your protein (ground beef, chicken) and store it in an airtight container in the fridge . You can also shred your cheese and store it in a zip-top bag .
- 1 Day Ahead: Chop sturdy vegetables like onions and prepare any homemade salsas or pickled onions .
- Day of the Party: Assemble the nachos on the sheet pan right before you plan to bake them to ensure they are as fresh and crispy as possible .
Q6: What are some good ingredient substitutions?
Nachos are incredibly versatile!
- Protein: Swap ground beef for ground turkey, ground chicken, or beef chorizo . For vegetarian options, use black beans, pinto beans, refried beans, plant-based meat crumbles, or sautéed mushrooms .
- Cheese: If you don’t have cheddar and Monterey Jack, Colby-Jack or Pepper Jack are also great melting cheeses .
- Toppings: Get creative! Corn, sliced black olives, pickled red onions, and sliced radishes are all fantastic additions